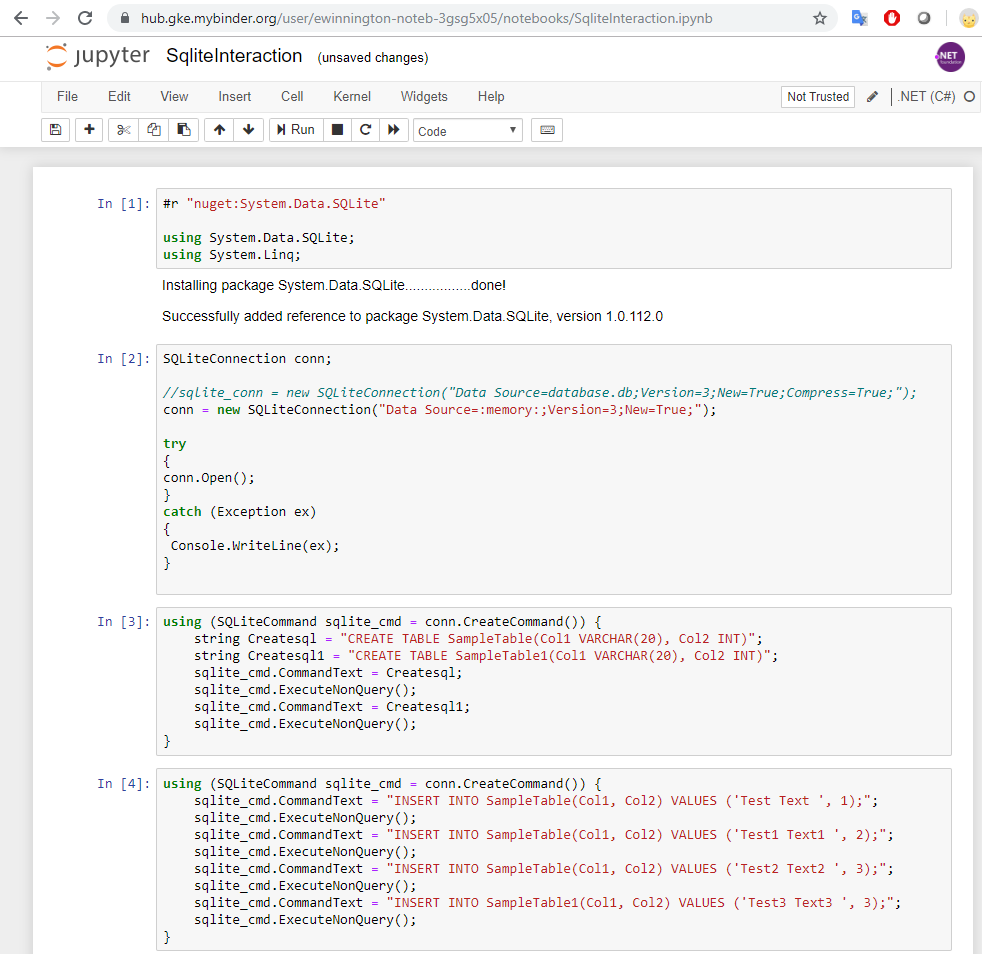
MyBinder.org in collaboration with Dotnet try allows you to host your .net notebooks online.
To light up this for your own hosted repositories, you will need a public github repo. Inside the repository, you will need to create a Docker file that gives the setup required for MyBinder to setup the environment of the workbook.
The dotnet/try has the set of instrunctions.
For my repository, I used the following Dockerfile
A list of my changes to the standard one proposed by dotnet/try:
- I used a fixed docker image
jupyter/scipy-notebook:45f07a14b422 - Since I have all my notebooks in the root of my repository I did
COPY . ${HOME}/Notebooks/ - Since I am always importing the Nuget files at the top of my workbook, I did not need to have the docker deamon add a nuget config. So I commented out the COPY command
# COPY ./NuGet.config ${HOME}/nuget.config - I commented out the custom
--add-source "https://dotnet.myget.org/F/dotnet-try/api/v3/index.json"from the installation of the dotnet try tool, since I had issue with the nuget feed with the pre-release version. Installing withRUN dotnet tool install -g dotnet-trywill get you the latest released version.
FROM jupyter/scipy-notebook:45f07a14b422

# Install .NET CLI dependencies

ARG NB_USER=jovyan
ARG NB_UID=1000
ENV USER ${NB_USER}
ENV NB_UID ${NB_UID}
ENV HOME /home/${NB_USER}

WORKDIR ${HOME}

USER root
RUN apt-get update
RUN apt-get install -y curl

# Install .NET CLI dependencies
RUN apt-get install -y --no-install-recommends \
        libc6 \
        libgcc1 \
        libgssapi-krb5-2 \
        libicu60 \
        libssl1.1 \
        libstdc++6 \
        zlib1g

RUN rm -rf /var/lib/apt/lists/*

# Install .NET Core SDK
ENV DOTNET_SDK_VERSION 3.0.100

RUN curl -SL --output dotnet.tar.gz https://dotnetcli.blob.core.windows.net/dotnet/Sdk/$DOTNET_SDK_VERSION/dotnet-sdk-$DOTNET_SDK_VERSION-linux-x64.tar.gz \
    && dotnet_sha512='766da31f9a0bcfbf0f12c91ea68354eb509ac2111879d55b656f19299c6ea1c005d31460dac7c2a4ef82b3edfea30232c82ba301fb52c0ff268d3e3a1b73d8f7' \
    && echo "$dotnet_sha512 dotnet.tar.gz" | sha512sum -c - \
    && mkdir -p /usr/share/dotnet \
    && tar -zxf dotnet.tar.gz -C /usr/share/dotnet \
    && rm dotnet.tar.gz \
    && ln -s /usr/share/dotnet/dotnet /usr/bin/dotnet

# Enable detection of running in a container
ENV DOTNET_RUNNING_IN_CONTAINER=true \
    # Enable correct mode for dotnet watch (only mode supported in a container)
    DOTNET_USE_POLLING_FILE_WATCHER=true \
    # Skip extraction of XML docs - generally not useful within an image/container - helps performance
    NUGET_XMLDOC_MODE=skip \
    # Opt out of telemetry until after we install jupyter when building the image, this prevents caching of machine id
    DOTNET_TRY_CLI_TELEMETRY_OPTOUT=true

# Trigger first run experience by running arbitrary cmd
RUN dotnet help

# Copy notebooks

COPY . ${HOME}/Notebooks/

# Copy package sources

# COPY ./NuGet.config ${HOME}/nuget.config

RUN chown -R ${NB_UID} ${HOME}
USER ${USER}

# Install Microsoft.DotNet.Interactive
RUN dotnet tool install -g dotnet-try
#--add-source "https://dotnet.myget.org/F/dotnet-try/api/v3/index.json"

ENV PATH="${PATH}:${HOME}/.dotnet/tools"
RUN echo "$PATH"

# Install kernel specs
RUN dotnet try jupyter install

# Enable telemetry once we install jupyter for the image
ENV DOTNET_TRY_CLI_TELEMETRY_OPTOUT=false

# Set root to Notebooks
WORKDIR ${HOME}/Notebooks/
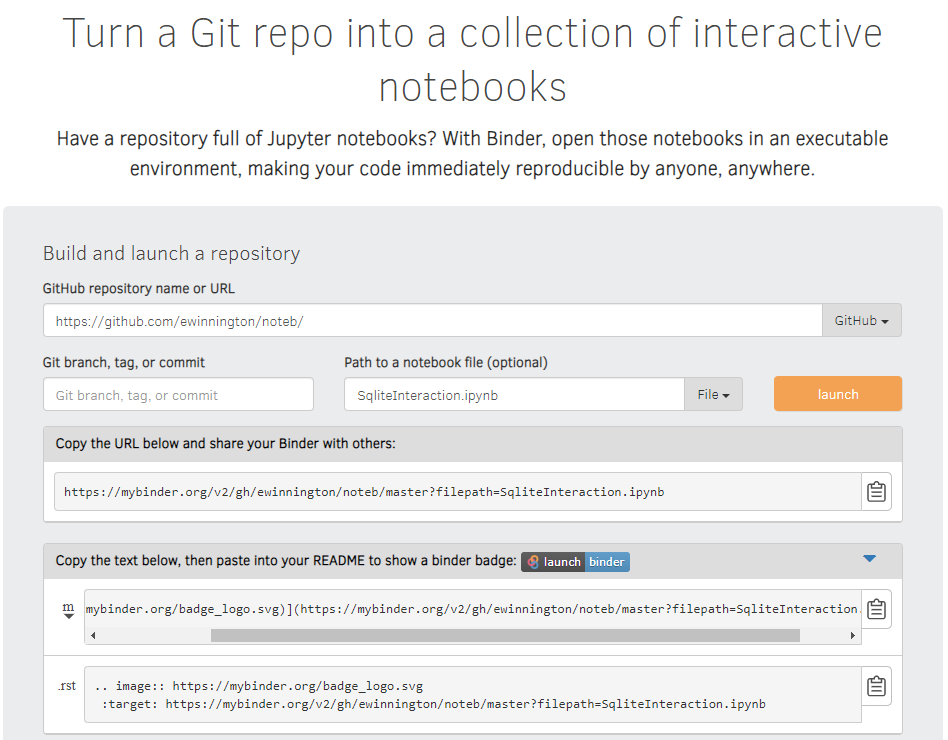
Once the Dockerfile is in the repository. Head over to MyBinder.org and enter the link to your repository. Optionally, you can set an initial ipynb file to start when the link is clicked.

When you click "launch", MyBinder will download your repository and start the docker build, very soon you will be able to access your binders online. Fully shareable and totally awesome!
