Receiving compressed data from an http(s) endpoint
Posted on Wednesday, 20 March 2024
With the amount of data that we are passing around across services, it is often beneficial to use compression on the data to reduce the transmission time. Modern platforms and algorithms are now very efficient at compressing regular data, particularly if that data is text or json data.
If the developer of the endpoint has prepared their service for compression, the client must still indicate that they are ready to receive the compressed data. Luckily, most implementations of modern http clients in R, Python, JavaScript and Dotnet support compression / decompression and are seamless for the client. This means that you can set the compression headers on and simply benefit from compressed data being received.
We can also check in the Content-Encoding header which compression was used. I've found that example.com is sending responses compressed with gzip.
Python
import requests

url = "http://example.com"  # Replace with the actual URL you want to request

# Specify the accepted encoding methods in the headers
headers = {
    'Accept-Encoding': 'gzip, br',
}

response = requests.get(url, headers=headers)
print(response.text)

# In case you want to see if it was compressed, you can check via the headers
#if 'Content-Encoding' in response.headers:
#    print(f"Response was compressed using: {response.headers['Content-Encoding']}")
#else:
#    print("Response was not compressed.")
R
library(httr)

# The URL to which you're sending the request
url <- "http://example.com"

# Setting the Accept-Encoding header
response <- GET(url, add_headers(`Accept-Encoding` = 'gzip, br'))

# The content of the response will be automatically decompressed by httr, so you can access it directly.
content(response, "text")
C#
In C#, for some ungodly strange reason, the standard HTTP endpoint doesn't decompress for you automatically unless you add a decompression handler - see handler HttpClientHandler.AutomaticDecompression
using System;
using System.Net.Http;
using System.Net.Http.Headers;
using System.Threading.Tasks;
using System.Text;

class Program
{
    static async Task Main(string[] args)
    {
        HttpClientHandler handler = new HttpClientHandler();
        handler.AutomaticDecompression = System.Net.DecompressionMethods.GZip; //Adding automatic Decompression means that the accept headers are added automatically

        using (var client = new HttpClient(handler))
        {
            string url = "http://example.com";
            HttpResponseMessage response = await client.GetAsync(url);
            response.EnsureSuccessStatusCode();

            Console.WriteLine(await response.Content.ReadAsStringAsync());
		}
	}
}
JavaScript
it is so easy that you don't even need to do anything else than setting the gzip: true for the support
const request = require('request');
const requestOptions = {
  url: 'http://example.com',
  gzip: true, // This is all that is required
};
request(requestOptions, (error, response, body) => {
  // Handle the response here
});
DevContainers - The future of developer environments
Posted on Monday, 24 July 2023
History
It's been years now that we've had Infrastructure as Code (IaC), Containers and Desired state Configuration (DsC) tools to do our deployments. But these have been mostly focused on the deployment side of things, with fewer tools on the developer side. On the dev machine, installing and maintaining the development tools and package dependencies has been in flux, both in windows where finally tools like Ninite, Chocolatey and Winget allow management of dev tools, and on the linux side, which was always quite well served with apt - but has also gained Snap, Flatpack and other package management tools. The thing is, sometimes you need more that one version of a particular tool, Python3.10 and Python3.11, Java9 and Java17, Dotnet 4.8 and Dotnet 6, to work on the various projects you have during the day. Sometimes, they work side by side very well and sometimes they don't. And when they don't, it can be a long process to figure out why and also very difficult to get help without resorting to having a clean image refresh and starting again to install your dependencies.
Since the end of the 2010s and the early 2020s, with the rise of web hosted IDEs, there has been a need to define ways to have a base image that contained the environment and tools needed to work. I remember running some in the mid 2010s - Nitrous.IO (2013-16) - that allowed you to use a base container and configure it to do remote development.
DevContainers
With the arrival of Docker on every desktop, Github's Cloudspaces and Visual Studio Code, there's been a new interest in this type of desired state environments with developer tooling. Microsoft published the DevContainer specification in early 2022 to formalize the language.
So how does it help us? Well, with a DevContainer, we can setup a new development environment on Premise (in VSCode), on the cloud VM (Azure+VM) or on a Codespace environment with a single file that ensures that we always have the tools we want and need installed. Starting to work is as easy as openining the connection and cloning the repo we need if the .devcontainer file is located inside.
DevContainer example
You can find below my personal DevContainer, it is setup with Git, Node, AzureCLI, Docker control of hose, Dotnet, Terraform, Java with Maven, Python3 and Postgresql. I also have the VSCode extensions directly configured so I can directly start using them when I connect. I also use the "postStartCommand": "nohup bash -c 'postgres &'" to run an instance of Postgresql directly inside the development container, so I can a directly have a DB to run requests against. And yes, this is a bit of a kitchen sink DevContainer, they can be smaller and more tailored to a project with only one or two of these features included, but here I use a generic one add added everything I use apart from the c++ and fortran compilers.
{
    "name": "Erics-base-dev-container",
    "image": "mcr.microsoft.com/devcontainers/base:debian",

    "features": {
        "ghcr.io/devcontainers/features/git:1": {},
        "ghcr.io/devcontainers/features/node:1": {},
        "ghcr.io/devcontainers/features/azure-cli:1": {}, //azure-cli,
        "ghcr.io/devcontainers/features/docker-outside-of-docker:1": {}, //docker on host
        "ghcr.io/devcontainers/features/dotnet:1": {}, //dotnet installed
        "ghcr.io/devcontainers/features/terraform:1": {},
        "ghcr.io/devcontainers/features/java:1": { "installMaven" : true },
        "ghcr.io/devcontainers-contrib/features/postgres-asdf:1": {}
    },

    // Configure tool-specific properties.
    "customizations": {
        // Configure properties specific to VS Code.
        "vscode": {
            "settings": {},
            "extensions": [
                "streetsidesoftware.code-spell-checker",
                "ms-azuretools.vscode-docker",
                "ms-dotnettools.csharp",
                "HashiCorp.terraform",
                "ms-azuretools.vscode-azureterraform",
                "GitHub.copilot",
                "GitHub.copilot-chat",
                "vscjava.vscode-java-pack",
                "ms-python.python"
            ]
        }
    },

    // Use 'forwardPorts' to make a list of ports inside the container available locally.
    // "forwardPorts": [3000],

    // Use 'portsAttributes' to set default properties for specific forwarded ports.
    // More info: https://containers.dev/implementors/json_reference/#port-attributes
    "portsAttributes": {
        "3000": {
            "label": "Hello Remote World",
            "onAutoForward": "notify"
        }
    },

    // Use 'postCreateCommand' to run commands after the container is created.
    "postCreateCommand": "",

    "postStartCommand": "nohup bash -c 'postgres &'"

    // Uncomment to connect as root instead. More info: https://aka.ms/dev-containers-non-root.
    // "remoteUser": "root"
}
So how do you start with DevContainers?
There are 2 easy ways:
- (remote) Github Codespaces By going to my repo, you can click "Create Codespace on Master" and get a running VSCode in the cloud with all those tools setup instantly.
(at first build, the image might take time)
- (local) Docker + VS Code Ensure you have the ms-vscode-remote.remote-containers extension installed in VS Code and Docker installed.
Clone the repo https://github.com/ewinnington/DevContainerTemplate.git, then open it with VSCode. It should automatically detect the .devContainer and offer to rebuild the container image and open it up in the IDE for you.
Once that is done, you should have access to a complete environment at the state you specified.
What's the use for Developers at corporations where computers are locked down?
I think that providing developer windows machine with Git, Docker, WSL2 installed and using VS Code or another IDE that supports DevContainers is an excellent way forwards in providing a good fast and stable environment for developers to work faster and more efficiently. Using this configuration, any person showing up to a Hackathon would be able to start working in minutes after cloning a repository. It would really simplify daily operations, since every repo can provide the correct .DevContainer configuration, or teams can share a DevContainer basic configuration.
This all simplifies operations, makes developer experience more consistent and increases productivity since you can move faster from one development environment to another in minutes. OnPrem → Remote VM → Cloudspace and back in minutes, without any friction.
All in all, I'm convinced it is a tool that both IT support must understand and master how to best provide access to, and for developers to understand the devContainer to benefit from it.
Have you used DevContainers? What is your experience?
Proxmox 8 on sub $200 mini PCs
Posted on Saturday, 1 July 2023
Installing Proxmox, Tailscale, Win11 VMs and Automation
This is a Beelink MiniS12 with an Intel N95s.
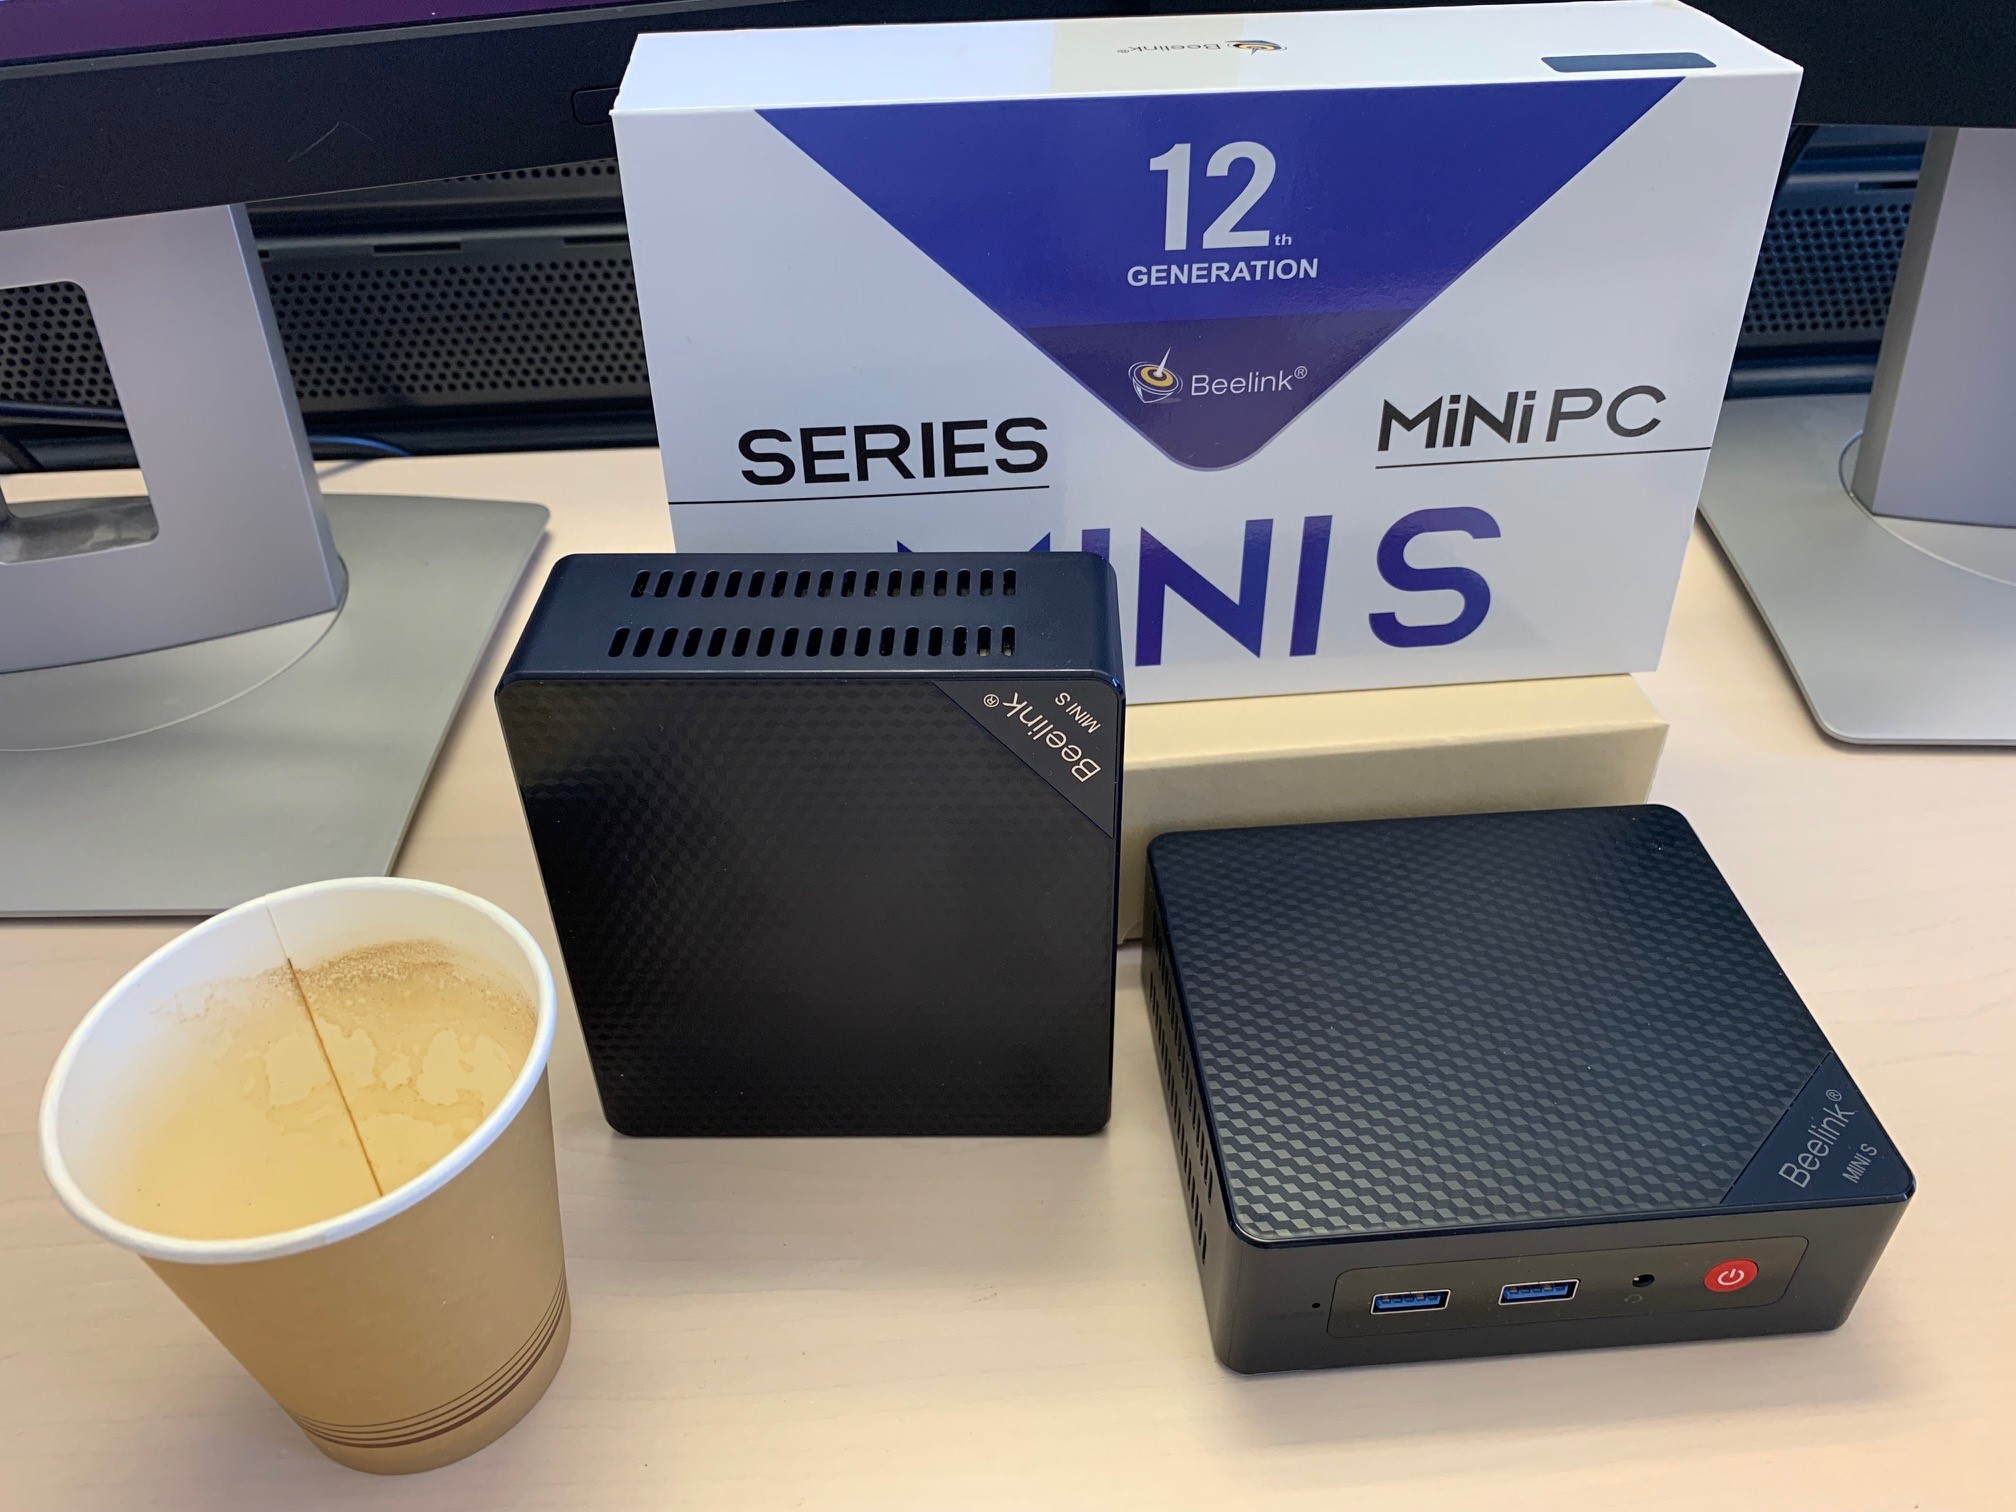 (coffee cup for scale)
Up until Proxmox 8 dropped about a week ago, I was unable to install Proxmox due to compatibility with the graphics driver. Now in 8, that was fixed, so I've been able to install Proxmox on several of my machines.
The procedure is trivial: write the proxmox iso to a usb key via a software that will make the iso bootable. Boot the machine with the usb key inserted and select the correct boot drive, then follow the proxmox installation prompts.
It all worked out of the box.
Clustering
I was able to connect to my proxmox installed machine on the port :8006 via a browser on my home network. Next step was enabling the management of multiple machines via a single UI. So as soon as I had two machines with Proxmox installer, I was able to go to my primary, click on Create cluster, confirm. Get the Join token, connect to the socond machine and paste the join token into the "Join Cluster". Worked out of the box.

Removing the Update Repositories to work on the Free version of Proxmox
To stay within the Free licensing of Proxmox and be able to do apt-get, remember to go for each machine and to remove the non-free repos in the repository list.

Installing Tailscale
I use Tailscale at home to connect across multiple locations and roaming devices. Every time I add a Tailscale device, I am amazed at how easy it is.
curl -fsSL https://tailscale.com/install.sh | sh
tailscale up
Two lines, one URL to visit and the machines were enrolled.
VMs and LXCs
To create VMs and LXCs, you need to add iso images or Templates to your local storage:
Container templates, you can create your own and upload them or simply click on "Templates" and get a couple of ready made ones for use in your containers.

You can now get the official windows ISO from the microsoft website. So download it to your local machine and then Upload it to the ISO images.

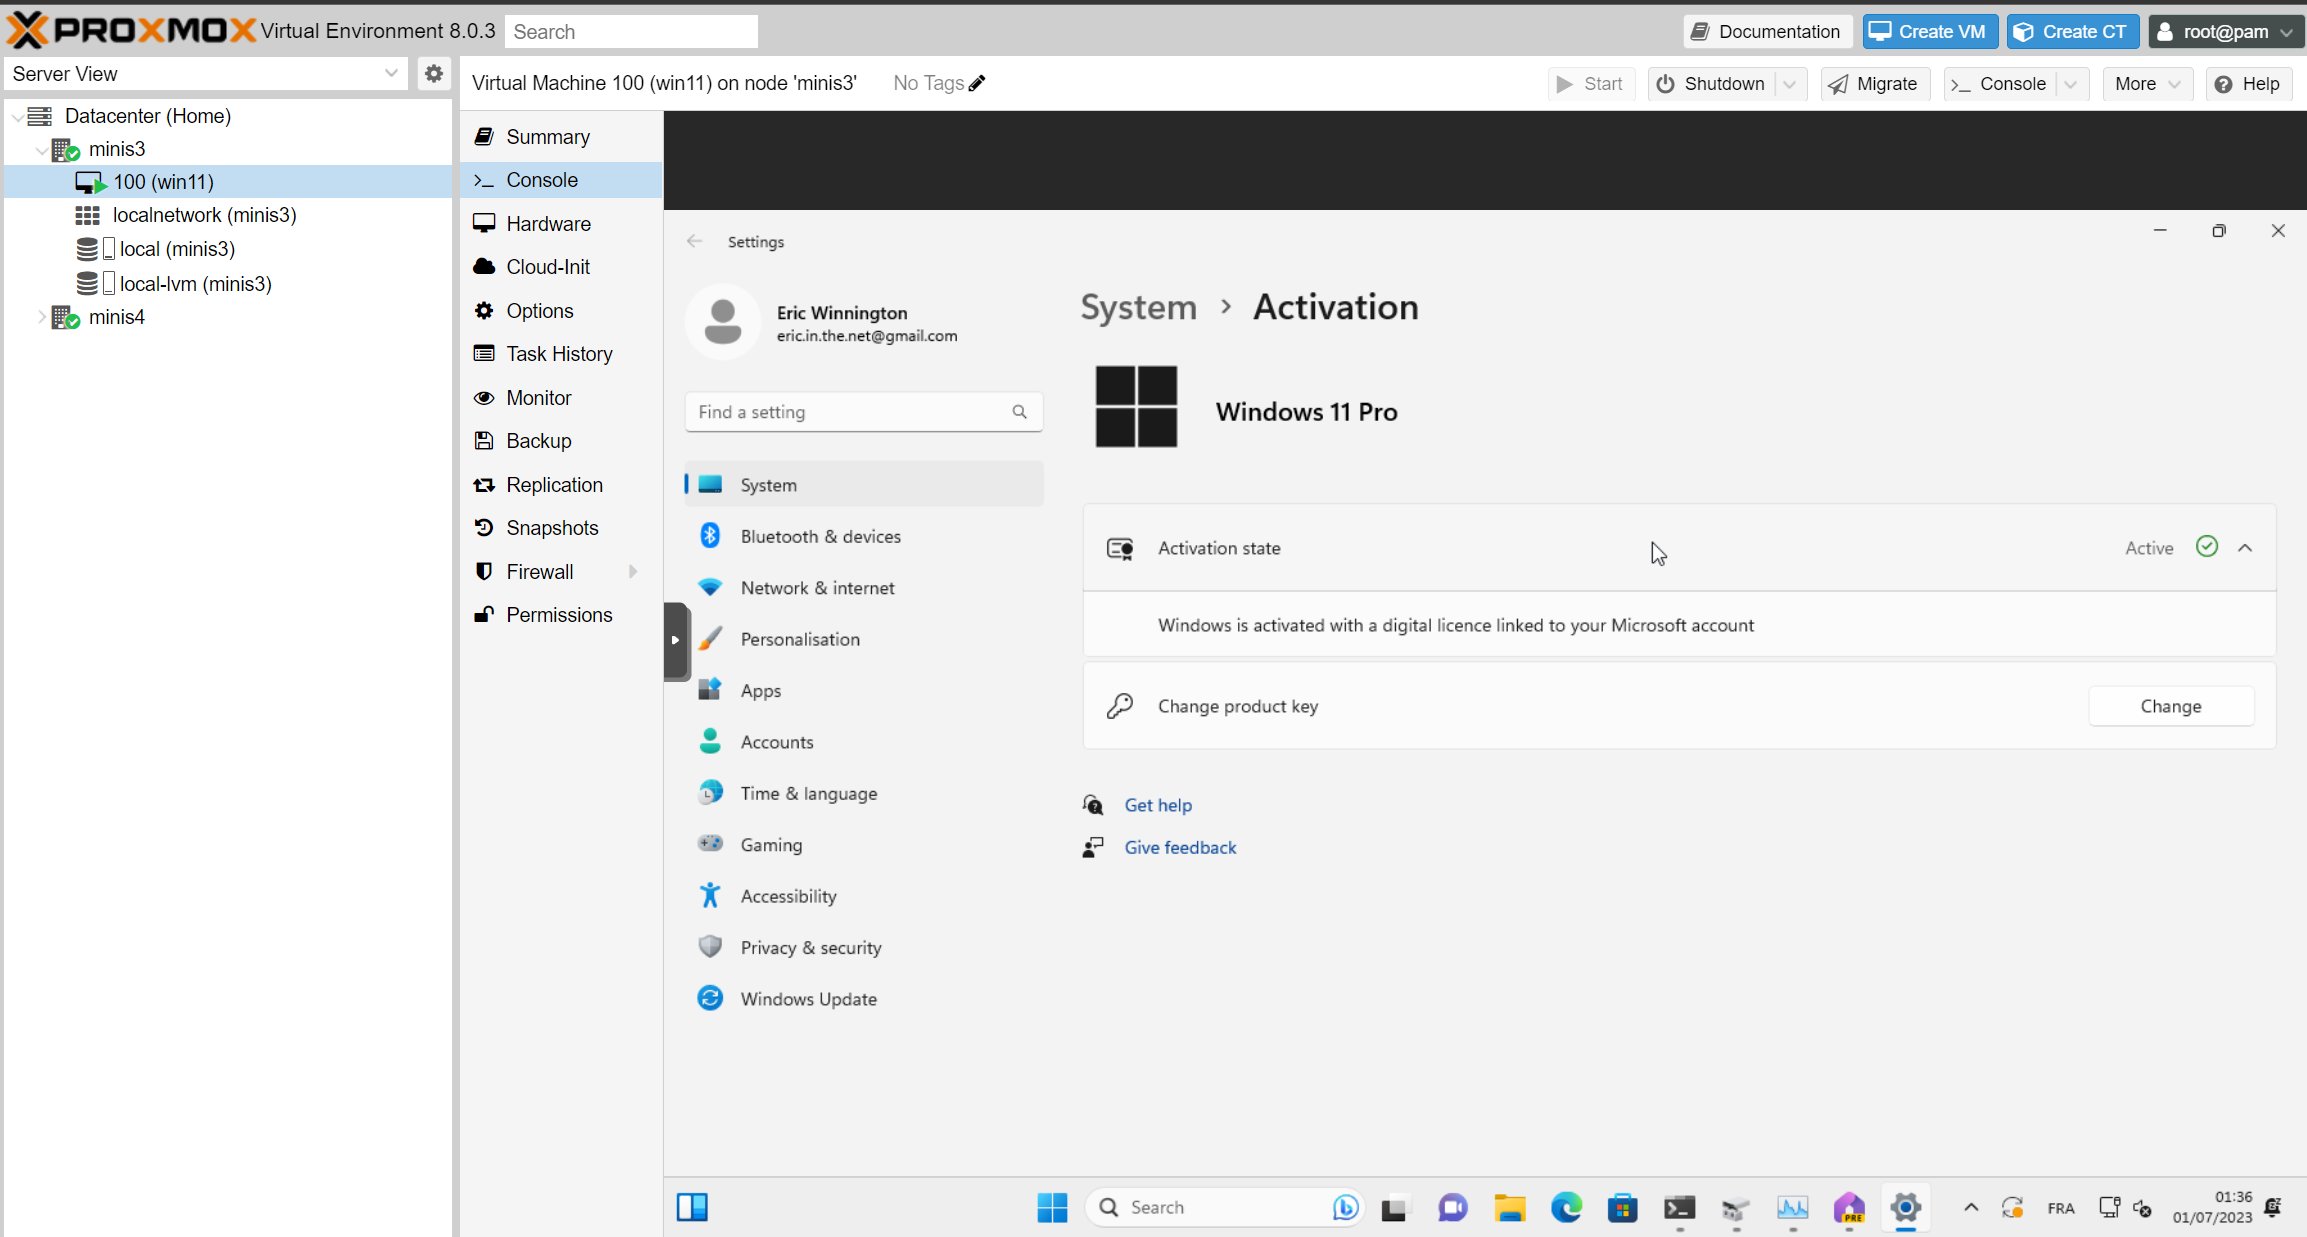
Installing Windows 11 Pro and activating with the Hardware license
I had previously logged in and linked to my microsoft account on the windows 11 pro licensed version of the OS for each of the machines. This meant that when installing the Windows11 Pro from the ISO onto a VM running on the machines, I was able to activate the machine by referring to the previous activation. #Windows11Pro allows itself to be reactivated with the license that came with the hardware, inside a proxmox8 VM of the same machine as long as you pass the host-cpu - or so it seems to me.
Issues I had and solutions
Console not connecting to LXC containers
Several times, either while connecting to a container in Proxmox directly, or after a containter migation, I was not able to use the integrated shell. I therefore had to change the Container "Options->Console mode" to "shell" to make it connect every time.

apt-get issue in proxmox containers
The first thing I do upon entering a container is nearly always apt-get update. And sometimes it breaks. I couldn't update or install. Here is my checklist:
Check you gave and ip address to the container in the "Network" section, either a dhcp or a static address.
Check your DNS servers: I had not noticed that after installing Tailscale, my DNS records were only pointing to the talescale DNS resolver. Adding back google (8.8.8.8) and cloudflare (1.1.1.1) to my proxmox hosts helped.
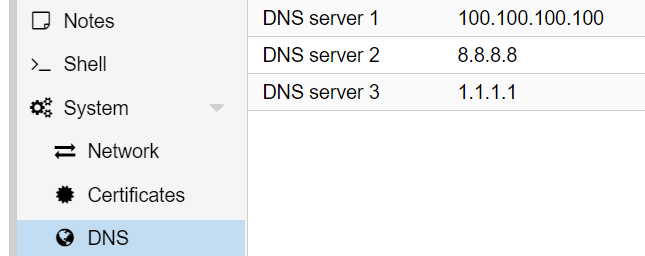
By fixing both of these I was able to get the apt-get running correctly.
Automation
Installing on a client machine the Proxmox CLI Tools
I'm planning on checking out automation of deployment on proxmox. Making a note here of the command line installation of the tools
sudo pip3 install pve-cli
I'll also look into Terraform + Ansible for a proxmox deployment, or the Packer LXC to make container templates, but that is for next time.
Network planning and VPN
Posted on Thursday, 20 April 2023
I am in the process of setting up my homelab network between my two locations.
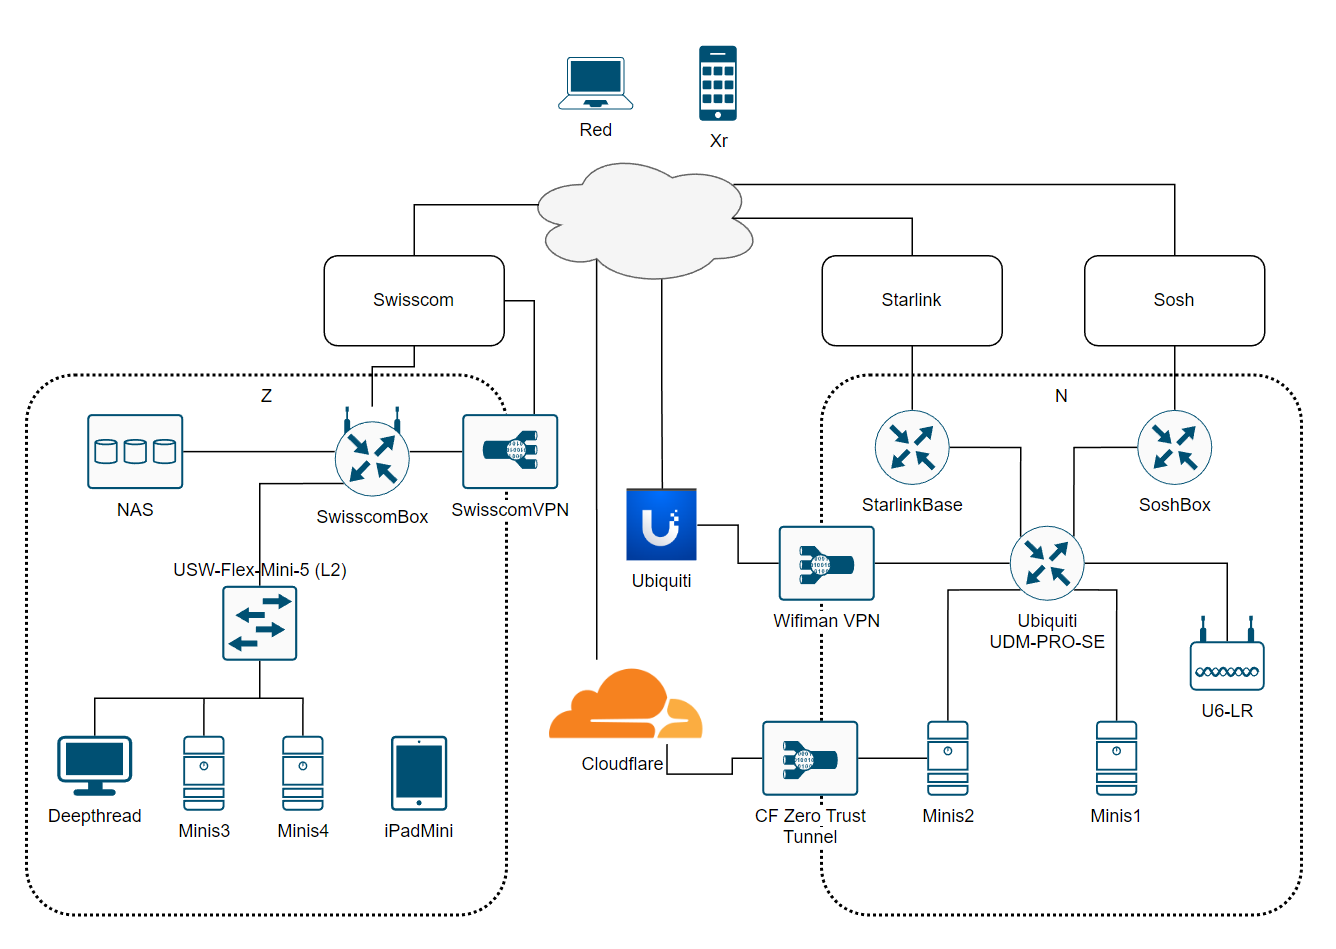
Zone Z
Z has a single fiber connection via Swisscom to internet.
Inventory
- DeepThread is an AMD Threadripper 1920x running Windows 10.
- Minis3 and Minis4 are the Beelink MiniS12 N95s running Ubuntu Server 23.04.
- NAS is an an older QNAP TS-269L
VPN
With a L2TP VPN connection configured to allow remote access onto the network, so I can get Red (Surface Laptop) and Xr (iPhone) onto the network in case.
Zone N
N has two connections, a Starlink (v1 round) with only the powerbrick router and Sosh as a backup DSL provider (with an ADSL Router) both connected to a Ubiquity UDM-PRO-SE in Failover mode. Getting a VPN to N is a little more involved, since the UDM is behind a separate router on each WAN.
Inventory
- Minis1 is the Beelink MiniS12 N95s running Windows 11. Planned to Switch to Ubuntu 23.04, but enjoying it VESA mounted behind a screen in the office currently.
- Minis2 is the Beelink MiniS12 N95s running Ubuntu Server 23.04. Currently rackmounted with the UDM-PRO.
VPN
On the UDM-PRO, a VPN is configured with Ubiquity and I can use the iOS application WifiMan to access the network. On Minis2, a cloudflared docker is running, reaching up to Cloudflare and providing an Zero trust tunnel to expose several dockerized websites hosted on it.
The issue at hand
I would like the N Minis1 & Minis2 to be able to access the Z NAS, ideally with a relatively simple connection that I can leave running all the time, to be able to pull files from the NAS and ideally also access the NAS's front-end application from inside my N location. I could connect to the SwisscomVPN every time I do something that requires connectivity to the NAS, but I would really ideally like a more permanent solution where I make the Z NAS "visible" in the N network. Or go full and establish a site-to-site VPN and simply make the two areas N and Z communicate seamlessly while still having local connectivity.
Do you have any suggestions as to how best to accomplish this?
22.04.2023
I now put a OpenVPN on the Qnap NAS to act as a S2S VPN. Not sure that will be the solution I keep for the long term but it works for now.

Tags
- Migrated (38)
- Thoughts (10)
- Database (10)
- CSharp (9)
- Architecture (7)
- Jupyter notebook (7)
- Dotnet try (7)
- Oracle (6)
- R (4)
- Space (4)