Introduction
Not that I have Wyam as a static site generator, I want to use Github Actions to automatically deploy it on push. This requires a quite few steps to setup, but I did it, now so can you!
Github actions is still in beta, so you'll have to enroll to use the functionality:
Setup procedure
This setup assumes you have a local Wyam that is working on your local machine. You can easily set one up by following these steps. You can always have a look at my https://github.com/ewinnington/ewinnington.github.io repository to see what I have configured in my config.wyam.
Personal page
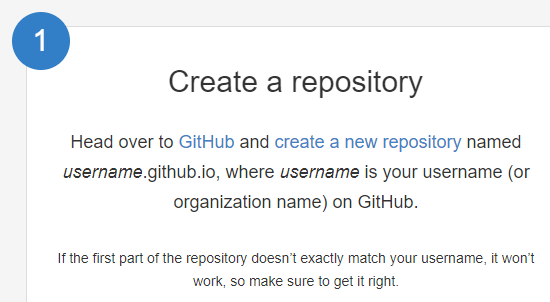
First you must have a Personal Page setup in github. This is done by creating a public repository username.github.io.
Create the correct branches
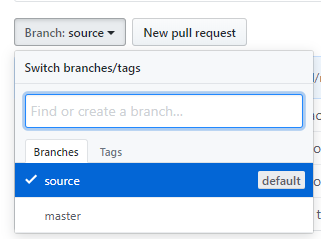
Inside that repository, you will want to create a second branch next to the master: source. This can be done by typing a new branch name in the Switch branches/tags text box.
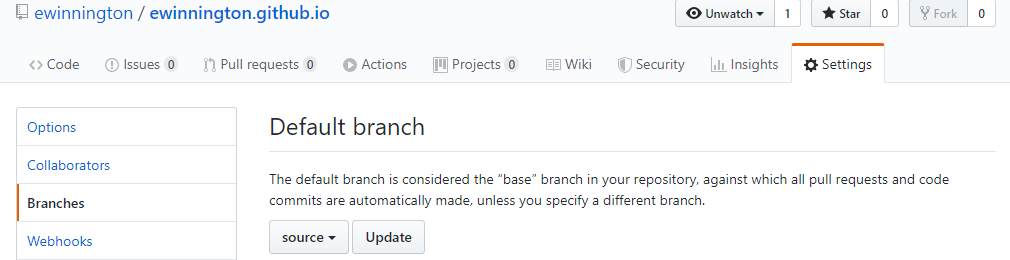
Next step is to make this branch the default when we push commits to the repository. This is because the master branch of the username.gitub.io is what is hosted on github's personal pages. Therefore the source of the wyam site has to be stored on another branch. To set the branch as default, Go to Settings, then Branches and select source in the dropdown box. Confirm with update.
Prepare keys and install them
We will be doing automated pushes from the source branch to the master branch, this means that we need to setup deploy keys and the associated secrets so that github allows us to update in an automated manner.
First, you need to generate your keys locally on your own machine with ssh-keygen -t rsa -b 4096 -C "Github-user-email@example.com" -f gh-pages -N "". You will need to replace Github-user-email@example.com with your own, of course.
This will generate two files:
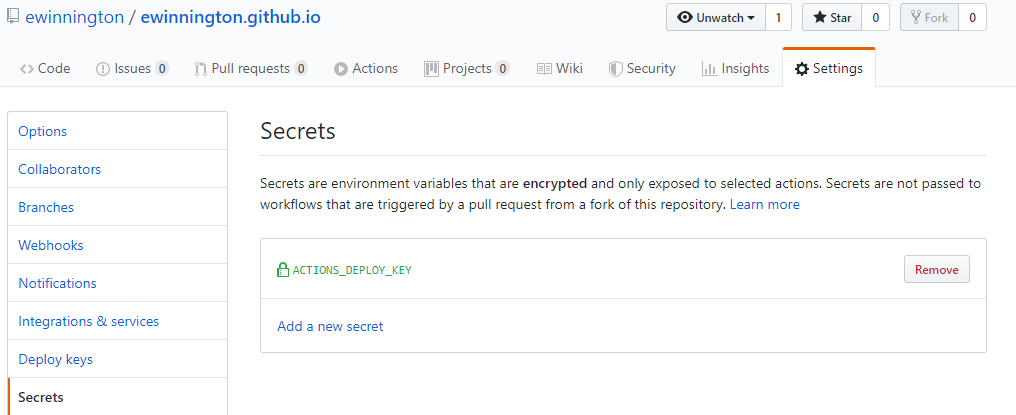
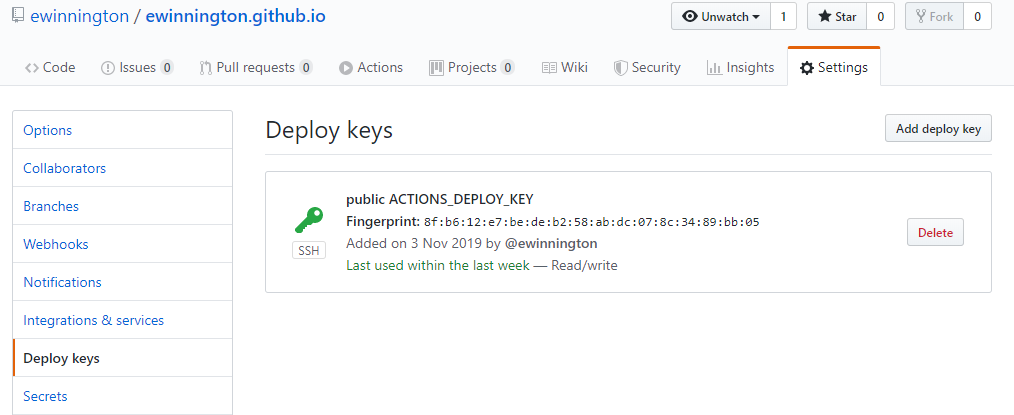
- gh-pages : the private key file, this will go into the secrets tab on github. I named the key ACTIONS_DEPLOY_KEY, this is important because we need to access it as an environment variable later in the action workflow script.
- gh-pages.pub : the public key file, this will go to the deploy tab on github. I named my deploy key public ACTIONS_DEPLOY_KEY.
Once installed, they should be like this in the github user interface of the repository:
Clone the repository (or import an existing git repo)
If you have nothing yet in the repository, I suppose you can now directly clone it from github using git clone https://github.com/username/username.github.io and it should come out all pre-prepared for you. Check something in and push.
Existing repository
I had an existing repository, so I had a few things to do with it before it was ready to be uploaded. I had already a master branch named master, so to make it conform with github, I renamed my local master branch with git branch -m source .
I then removed the previous origin before that was in use and I had to add the correct origin that I wanted to push to. Because I had previously had contents on the repository, I had to use the -f command on the push.
git remote remove origingit remote add origin https://github.com/username/username.github.iogit push -u -f origin source
Now that I had pushed the Wyam blog, I was ready to setup the actions.
Side note - good wyam .gitignore file
To avoid checking in the output files of the wyam build, I have the following .gitignore file in the repository:
config.wyam.dll
config.wyam.hash
config.wyam.packages.xml
wwwroot
output
Setting up the github actions
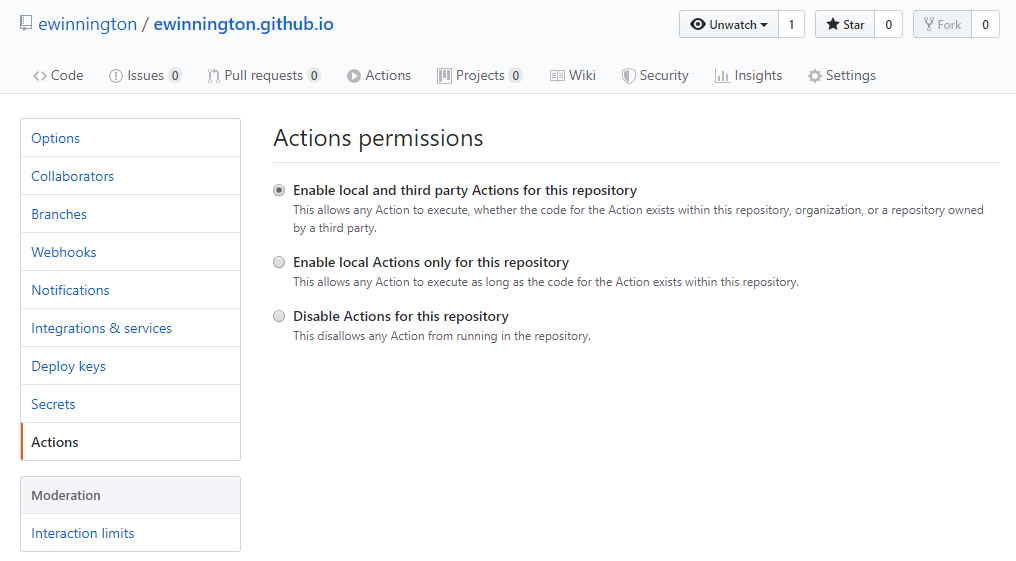
First you will want to check that you are allowing external workflow scripts to be launched on your repository, since I will be relying on a few steps from pre-existing scripts.
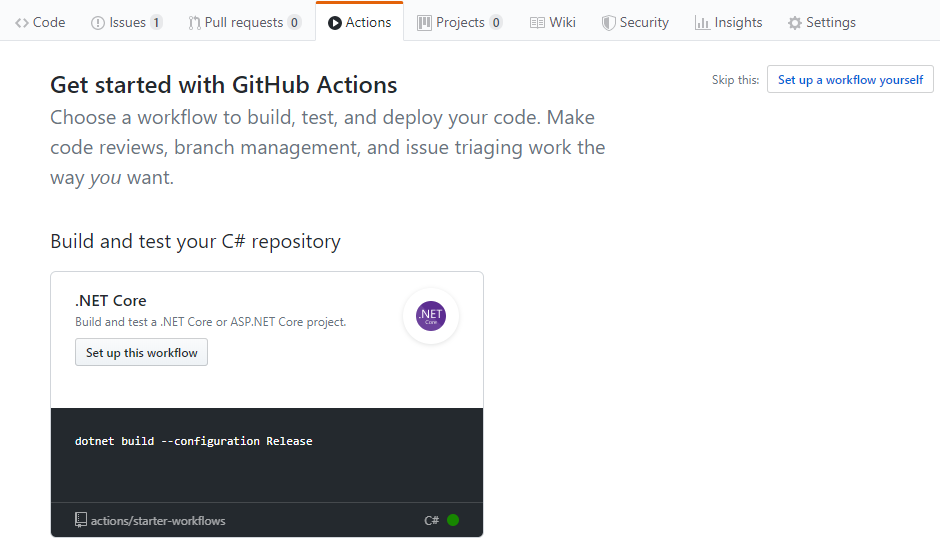
Here the first mistake I made while configuring actions was not going through the Github user interface and instead creating the folders manually in my github repository. I created .github/workflow instead of .github/workflows which meant that my actions were never kicking off. So don't make my mistake, use the github UI to set up the action and they will create the correct folder structure in your project.
I setup a yaml file name wyam.yml. You can see what it looks like here below (I have included the code below on the page for you to copy and paste if you want. Let's go through this line by line.
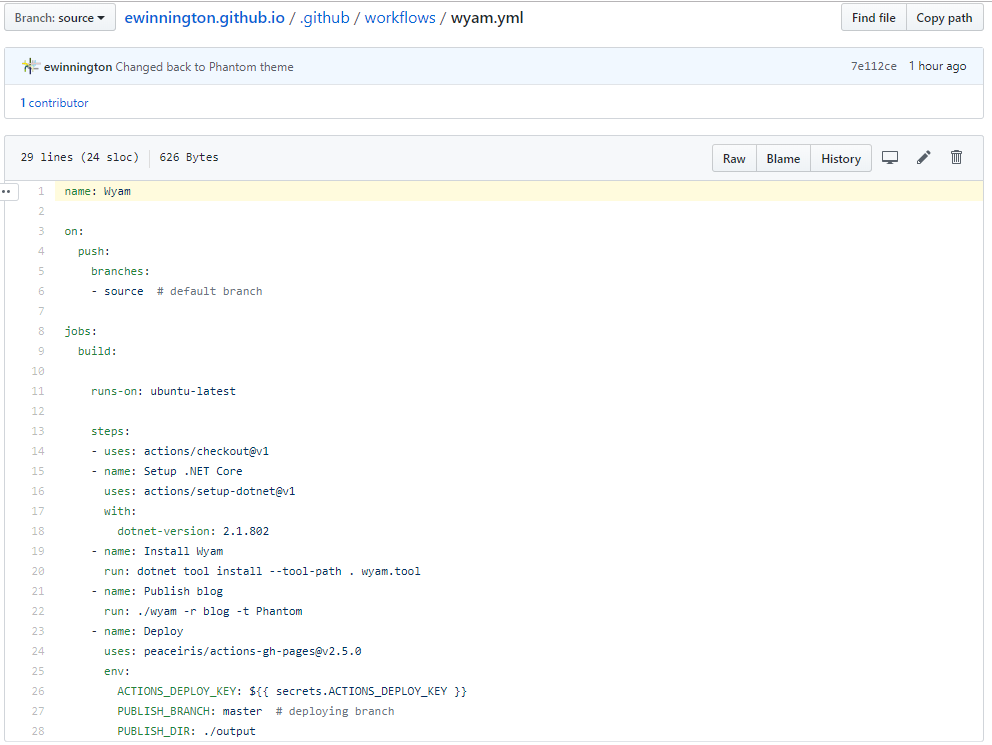
Line 1: Name of the action that will appear in the action tab
Line 3-6: Triggers of the action. Here we trigger the action on push of branch source.
Line 8: List of jobs to run. Line 9: First job is my build and deploy, I just called it build.
Line 11: The choice of the image to run on, like in docker. I chose ubuntu-latest.
Line 13: Each line prexifed with a - is a seperate action.
Line 14: Checkout the repository with the branch that has just been pushed. This is a standard github action, you can find explanations here
Line 15: Installing .net core for Wyam.
Line 19-20: Installing Wyam. Here I install Wyam as a local tool by giving the --tool-path ., since if you install it as a global tool with -g, the build system won't find it due to .net core's requirement to restart the shell after being installed for the paths to be valid.
Line 21-22: Running Wyam to render the blog to a set of static pages. Here is where you can change the template (Phantom) to something else if you want.
Line 23-28: We take the output of Wyam, which lives in the ./output folder and we use peaceiris's github action for Github Pages to publish our results to the correct branch master of our repository for deployment. We pass the secrets.ACTIONS_DEPLOY_KEY we defined earlier to allow the script to publish to the master branch.
name: Wyam

on:
  push:
    branches:
    - source  # default branch

jobs:
  build:

    runs-on: ubuntu-latest

    steps:
    - uses: actions/checkout@v1
    - name: Setup .NET Core
      uses: actions/setup-dotnet@v1
      with:
        dotnet-version: 2.1.802
    - name: Install Wyam
      run: dotnet tool install --tool-path . wyam.tool
    - name: Publish blog
      run: ./wyam -r blog -t Phantom
    - name: Deploy
      uses: peaceiris/actions-gh-pages@v2.5.0
      env:
        ACTIONS_DEPLOY_KEY: ${{ secrets.ACTIONS_DEPLOY_KEY }}
        PUBLISH_BRANCH: master  # deploying branch
        PUBLISH_DIR: ./output
Running the workflow
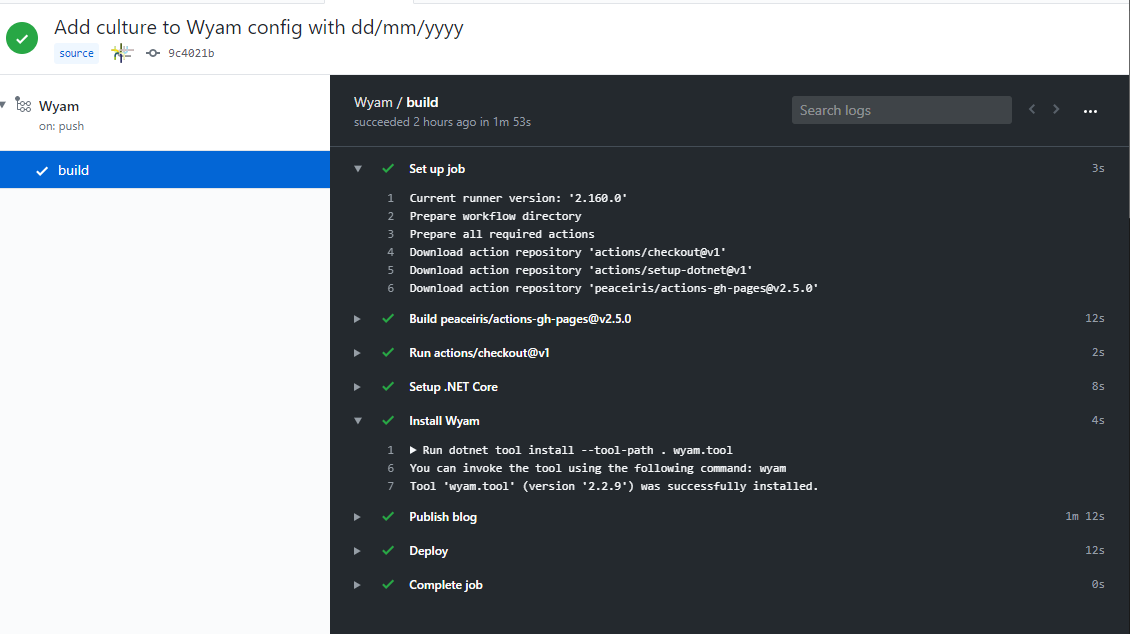
Once you have setup this file, you can commit it and it should start off the build action. You can follow the progress of the action workflow on the github action page.
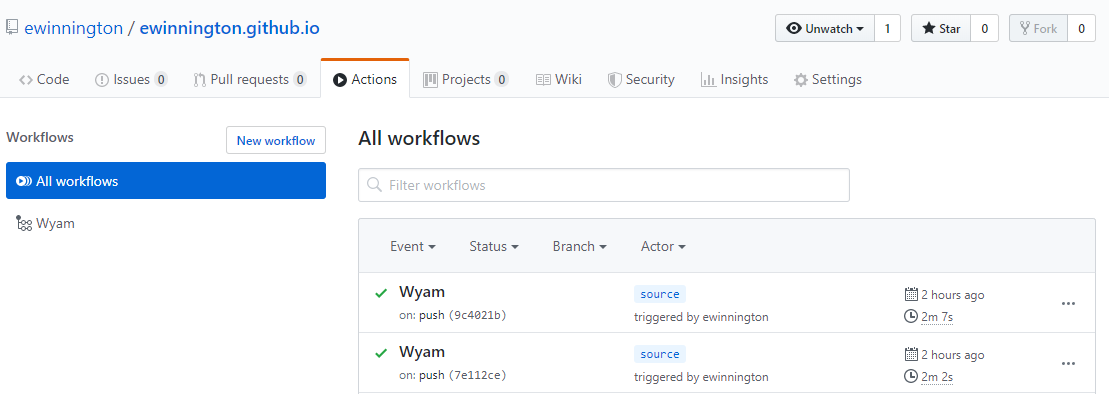
You can drill down into the details of the actions in case you had any failures. This is where I had the most trouble, but with these instructions, you should be fine.
Closing
If all went well, you should now have your personal wyam generated site up and running at http://username.github.io .
Please feel free to look around both branches source and master on my github repo to understand how my blog is setup.